

In The Visual Studio Blank App Template, Where Dgould I Out My Code?
Overview
In a recent post to software decision makers, I discussed reasons businesses should consider cross-platform native evolution over website development. Y'all can read the previous Xamarin Tutorial post hither.
In the post, I gave a instance to use the Xamarin toolset, why it should be considered, and why information technology could exist a skilful business and development conclusion for your arrangement.
In this Xamarin Tutorial series, I will be building a solution that can be used equally a starting point for cross-platform applications using the Xamarin toolset. Today I will exist focusing on the following:
- What is Xamarin?
- How to Setup the Xamarin evolution environs using Microsoft Visual Studio
- Briefly talk almost iOS support
- Discuss Shared vs Portable Form Libraries (PCL) strategies and how to use both
- Connecting to your Mac to debug an iOS version of your application
- Using the Visual Studio iOS Simulator to debug your iOS awarding
Xamarin – What is it?
Before we outset diving into creating our solution, I will include a snippet from the post mentioned higher up that gives you an overview of Xamarin. After this explanation, my assumption will be that y'all at to the lowest degree know what information technology is and why nosotros are using it.
Xamarin is a Microsoft owned company that started with the engineers that created the popular Mono, Mono for Android and MonoTouch, which are cross platform implementations of the Common Linguistic communication Infrastructure (CLI) and the Common Language Specifications, too known as .NET.
Xamarin uses a shared C#/.NET codebase along with either Xamarin Studio or Visual Studio, to write native Android, iOS, and Windows Apps. Did yous empathize that? Yes, native applications. Wow, so, all your lawmaking is 100% shared. Again, not exactly. But, close.
For near simple UI patterns, Xamarin.Forms allows you build native user interfaces for iOS, Android and Windows using 100% shared C#. It also includes dozens of controls and layouts which are mapped to native controls in their respective platform.
Depending on your application needs, all the same, you may need to access a platform specific feature, such equally Alive Tiles for Windows, or maybe y'all need to create a custom control that isn't a native control for any of the platforms. In these scenarios, Xamarin provides a means to call into platform specific code. Nonetheless, cheque this out, … expect for information technology … wait for it … information technology is yet in C#.

So, every bit you can come across, the App Logic and most of the user interface code is shared across all platforms. In fact, there is even a community of user-congenital components that y'all can leverage in your application using both NuGet and the Xamarin Component Store.
Development Environment – The Microsoft Way
At present that we have the basic definition and understanding of what Xamarin is, we can put that behind the states and make certain that we have the tools necessary to start developing. For this, my program is to stick with as many Microsoft technologies as possible.
Visual Studio
And so, first in this Xamarin Tutorial, I am going to assume that you are using Windows 10 and have a flavor of Visual Studio 2015 installed on your car. Even nether that assumption, we need to make sure that you have the Xamarin tools installed. Luckily, this is easy.
Showtime, make sure that you don't accept any instances of Visual Studio currently running.
Next, open your Windows Settings awarding and type add or remove in the search box. Select Add together or remove programs from the dropdown list.

You will be taken to the Apps and Features section of settings. Curlicue down and select Microsoft Visual Studio 2015. At present select Modify.

You volition be prompted to requite permission to the installer. Give it permission past selecting Yes. You should see the Installation programme initializing.

If you didn't shutdown Visual Studio 2015 before you selected Modify, the installer will notify you and recommend that you close Visual Studio now. If you did forget to close Visual Studio or skipped that step entirely, close Visual Studio at present and select Retry.

If Visual Studio is closed, the installer should provide you lot an selection to modify the current installation. Select Modify.

After selecting Modify, you will see a list of all the features currently installed. Since our goal in this Xamarin Tutorial series is to create a cross platform application, verify that all the Cross Platform Mobile Development features are enabled. We aren't going to use all of features, but if you know you are going to do cross platform development and you have the space, install it now and forget it, you will take all the tools necessary for the future.

Since I already have the features installed, I tin can be bodacious that all the necessary tools are installed for me to start developing cross platform applications. If some of the features weren't enabled for you, brand sure they are and select Update. This will install all the tools for you.
iOS Support
If we plan on having iOS support for our application, Xamarin.Forms does support it. So, yep, you tin can create iOS applications on Windows using C#.Net. However, yous will need a networked Mac running Bone X Yosemite (x.10) & to a higher place with XCode seven installed. You volition also need to install the Xamarin.iOS tools onto the Mac. The best way to exercise this is to use the Xamarin Unified Installer, which will install everything y'all demand. Y'all can view these instructions here.
I will presume that y'all accept XCode and the Xamarin.iOS tools setup on your Mac. Even so, I will discuss how to adhere to your Mac, build and run/debug the awarding later on in the postal service.
One thing we can do right now is setup the permissions to allow united states to debug our awarding on the iOS simulator on the Mac.
Commencement, on your Mac, search for Remote Login in Spotlight.

Select Sharing. Select Remote Login and brand sure that your account is in the list of Allow Access for: Only these users. I am an Administrator on my Mac, so I volition just allow all Administrators.

Note: You could allow All Users to take remote access, simply, I am not sure that is a good idea.
Your Mac should now be discoverable in Visual Studio. Once more, nosotros will talk more most this later.
Create a New Project
Blank Application
Now we tin can create our new project. Open Visual Studio, select File, New, Project…

Next, select Installed, Templates, Visual C#, Cantankerous-Platform. Then, select Cantankerous Platform App (Xamarin.Forms or Native). Enter the name of your projection. Brand sure the directory is correct and then select OK.

Another dialog prompting for the blazon of cross-platform project will be displayed. Select Blank App, Xamarin.Forms, Shared Project and then select OK.

Visual Studio volition start creating your Xamarin solution. However, since we are targeting Universal Windows Platform applications in our projection, you will be prompted for your Target and Minimum versions of Windows. I have chosen to target Windows 10 Anniversary Edition with a Minimum version of Windows 10 (Build 10586). Once you have made your selection, select OK.

You will also probably run across the following dialog while it is creating the solution.

When information technology is finished, you should notice that there are several projects in your solution. One for each of the platforms we will target with our application.

Along with the iOS, Android and UWP projects, yous should too notice that at that place is a Shared project. I know, I kind of blew past that office when I had you select the Code Sharing Strategy shared project. I did this on purpose, I volition explicate this in more than detail at present.
Xamarin uses a couple of strategies for sharing lawmaking within our Xamarin solution: Shared and Portable Class Library (PCL).
Shared Strategy
The shared strategy basically takes each file in the shared projection and compiles it under each of the other projects. Think of it as making a copy of the files in the shared project into each specific platform project then doing a build. You can however practice platform specific code in the shared projection past using #if compiler directives, but exist cautious, your code can, and probably volition, become ugly fast.
Annotation: the shared project isn't really a traditional project that gets built into an assembly. You tin can't actually build it.
Portable Course Libraries (PCL)
With portable class libraries, the code is compiled separately and referenced in each project like whatsoever normal form library. The big difference here is that you have access to a subset of .Cyberspace that is compatible with all the target platforms. So, for example, yous could use System.Net.Http, but trying to access hardware, such as, the camera API is not available. You could, still, use a generalized interface that uses dependency injection.
Both Shared and Portable?
So, as yous can see, each strategy mentioned above, contains some pros and cons. So, it really depends on the type of application and how much external sharing you lot are going to demand to do with the code. Simply put, if yous are going to share code outside of the awarding itself, PCL's are a good option. All the same, if this is a old application with no externally shared lawmaking, the shared strategy would be a skilful choice.
That existence stated, what if we want to employ both? Can nosotros practise that? To reply your question, yes. What if you have a lot of shared code between applications, just you lot as well have a significant amount that is just shared beyond your specific awarding?
In fact, let'southward add together a PCL to our projection for any code that nosotros might want to share with other applications we write in the future. Nosotros won't do annihilation with it right at present other than wire it upward for use in my next weblog postal service.
First, right-click on the solution, select Add together and then select New Project…

From here, we desire to repeat the same steps we used to create the solution, but in this case, we want to select a class library. Select Installed, Cross-Platform, Course Library (Xamarin.Forms). Enter the proper name of your shared class and select OK.

Okay, now, one thing you should know is, by default, the project volition add a Xamarin ContentPage, XamarinBlog.CommonServices.cs. You tin go ahead and delete it now.

Okay, we at present have a portable grade library in our solution, however, it isn't being referenced. Then, get alee and reference information technology in each of the platform specific projects by right clicking on references and selecting Add Reference…

Select Projects, then Solution, and so select your new PCL from the list. Finally, select OK.

Okay, now that we accept our PCL referenced in each projection, y'all should be able to build most of the projects. As far as the iOS project, we actually haven't talked almost how to connect to your Mac for building, and so let's do that quickly.
Connecting to the Mac
For us to build our iOS projection, nosotros will need to connect your Visual Studio iOS project to a Mac. To do this for the first time, all you practice is attempt to build the project. Right-click on the project and select Build. If you haven't connected earlier, Visual Studio will brandish instructions for setting up the remote login functionality on your Mac. Since we already did this before in the post, nosotros will skip them and select Next. If yous would like, you lot can plow off the instructions for next time, however, if you lot are similar me, I forget the "setup one time and forget" things, so I usually get out mine unchecked.

You will now be prompted to pick your Mac. For information technology to show upward in the list, you must take setup remote access properly and the Mac bust be on the same network equally Visual Studio. Select your Mac and then select Connect.

Adjacent, you volition exist prompted for your username and password. Enter your credentials and select Login.

Once you have selected Login, it volition attempt to connect to your Mac. If it is successful, you volition see a link under the Icon for the machine you selected. Once yous see this, select Shut.

Now, go alee and try to build. I should build successfully if everything on your Mac is setup correctly.
Can I see Something?
I know, nosotros accept done a lot upwardly to this point and nosotros haven't seen a darn thing. Well, before we run the application, I exercise desire to mention a couple more things. Showtime, let's look at where this whole application starts in code. Where is the application object for this thing?
In the shared project, XamarinBlog, open up App.xaml.cs.

Find this is where our Application object for all our projects resides. How do we know what page to load starting time? Cheque out the constructor. Notice that we assign XamarinBlog.MainPage to the MainPage property of our application. Also, yous may accept noticed that at that place are a number of events that are created for the states: OnStart(), OnSleep() and OnResume(). These are awarding lifecycle events that get fired for each platform. We will probably talk more than about these in subsequently posts in this serial.

Let's look at the XamarinBlog.MainPage object in Mainpage.xaml and see if nosotros tin figure out what this page is going to be presenting us. Select MainPage.xaml.

Looking at the markup, we come across we are creating a ContentPage with a label, that has the text 'Welcome to Xamarin Forms!", and information technology is centered in the middle of the page.

At present that we know what it is supposed to do, let's encounter it in action. Build and run the application for each platform and see what you become. Information technology should look something similar the post-obit:


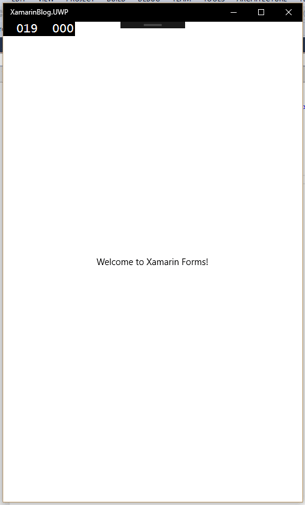
Absurd, correct? Three platforms, mostly the same code. Well at least the UI, and then far.
Using Visual Studio iOS Simulator
It is nice to be able to debug on your Mac, merely I must admit, it is kind of a pain at times to be forced to sit down by the automobile to examination your application. Well, a cool new feature for Visual Studio is the Visual Studio iOS Simulator. This add-in for Visual Studio allows us to debug our iOS version of the app correct on our estimator. So, yous don't need to be nigh your Mac to practice the debugging. You can exercise it right on your PC.
To go the add-in, download the installer hither. You might accept to restart Visual Studio for changes to have result. Once you exercise, brand certain that you select iPhoneSimulator and run the application again.

You lot should run into the Visual Studio iOS Simulator with your application.

If for some reason, yous would like to disable the Visual Studio add-in and go back to debugging your iOS application on the Mac you tin practise so. All you need to do is select Tools from the main menu and then select Options…

Scroll down to the Xamarin tab and select iOS Settings. Uncheck the Remote Simulator to Windows checkbox and select OK.

At present, you should be able to debug on your Mac again.
Summary
So, to summarize what nosotros learned in the outset part of our Xamarin Tutorial series:
- We answered the question, "What is Xamarin?"
- Nosotros Setup the development environment using Microsoft Visual Studio
- Briefly talked about iOS support in Xamarin and Visual Studio
- Pointed out the differences between the Shared and Portable Class Libraries (PCL) strategies and how to use both
- Demonstrated how to connect to your Mac to debug the iOS version of your application
- Installed Visual Studio iOS Simulator and ran our iOS application on our PC
In Role 2 of this Xamarin Tutorial series, we will talk well-nigh implementing the Model-View-ViewModel pattern using the MVVM Low-cal Toolkit to maintain a solid separation of concerns. So, stop back and continue your journey with me on developing cross-platform applications using Xamarin.
I hope you lot enjoyed this post. If and then, please feel free to share with others.
Building a mobile awarding and need assistance? Intertech knows a matter or two about Xamarin. Nosotros provide forth with services to your team. Run into how nosotros tin can assistance!

In The Visual Studio Blank App Template, Where Dgould I Out My Code?,
Source: https://www.intertech.com/xamarin-tutorial-part-1-create-a-blank-app/
Posted by: edwardswiging.blogspot.com
0 Response to "In The Visual Studio Blank App Template, Where Dgould I Out My Code?"
Post a Comment